

Photographing and stitching panoramic images
It is Possible to take panorama pictures by photographing consecutive pictures of a scene next to each other. Those photos should have a certain amount of overlap so that they can later be put together using one of several Photo stitching programs on your computer. When all steps are performed accurately the seams between the consecutive photos making up the panoramic scene should be invisible.

Setting up the camera
If you want a flawless and seamless panoramic photograph it is important to set up your camera before taking any photos. You want all photos to have identical lighting and color tones. To achieve consistency set the Shutter-speed, Aperture (F-number) ISO and white balance manually and leave those settings unchanged for all photos that will be part of your panorama.
Consistent exposure settings
A scene will usually have brighter and darker sections and you need to choose the appropriate exposure settings for the scene as a whole? Either set your camera exposure to the most significant part of the scene, or point your camera at the darkest and then the brightest section of the scene while observing the appropriate settings for both. Then set your camera somewhere between the two. If your camera has a Histogram utilize it when setting the exposure and try to avoid any clipping. You might find that in many cases it might be better to go for a setting which is slightly underexposed as a whole to avoid blowing out the brighter areas of your panorama.
Consistent white balance
Different areas of your panoramic scene will be lit differently. For instance some areas in a landscape scene might be in direct sunlight while other areas might be in the shade and jet other areas might be covered by clouds. In order to prevent the cameras automatic white balance to change the color temperature of the individual images you need to manually set your cameras white balance. This ensurers consistency in the color-temperature throughout the scene.
Automatic lighting optimizers
If your camera has a auto lighting optimizer, color adjustment functions or any other type of automatic functions that makes changes to your Photos appearance make sure to either set them manually or turn them off.
Exposure Lock
Some cameras have a exposure lock function. The exposure lock allows you to keep the exposure settings locked in place allowing you to take multiple photos with identical exposure, which is another way to achieve consistently exposed pictures. Most point and shoot type cameras will not allow you to set everything manually. But some will provide a exposure lock function. Refer to your cameras manual to find out whether it has a lock function or a lock function equivalent. Just as before point your camera at the most appropriate section of the panorama about to be shot and when the camera has made all the settings press the exposure lock function and then take all the consecutive pictures of the panoramic scene ensuring that the lock function remains active throughout the sequence of photo.
Utilize the panorama mode on point and shoot cameras
If you are using a point and shoot camera you will probably not be able to set everything up manually. But the good news is that many point and shoot cameras have a panorama mode. The ability and restrictions of the panorama mode will diver between different cameras. The panorama mode will automatically keep the exposure locked in place, which is good but many cameras will only allow you to take three consecutive images. In many cases the camera will stitch these images together. When taking the photos in panorama mode the camera might display the previous photo next to a life view of the current scene to assist you in overlapping and lining up the image. But be aware that if you want to free yourselves from the restrictions imposed on you by the panorama mode. You have to opt for the other methods described in this article.
Focus
In order for seems to be invisible focus must be set identically on each photograph in most cases when photographing a landscape the focus will be set to infinity. If creating a panoramic scene of closer objects You will need to think about choosing a focus distance. You can increase your depth of field by setting up your camera with a smaller aperture (F-number). In any case you should use the same focus settings throughout all panoramic shots.
Focal length
Extreme wide angle shooting is not recommended even dough Photo stitching programs often do support fairly wide angles it becomes more difficult for the program to match the edges. For best results Don't go any wider then perhaps 35mm (35mm film equivalent) for best Results use a focal length of 50mm (35mm film equivalent). photos from a Tele lens with a large vocal length should stitch nicely but your Panorama will get a orthographic look which will not look as natural as the perspective of our eyes. But in some cases this might be exactly the look that you desire. You should take all photos with the same Focal length.
Panoramic arrangements
Panoramic Photography is not just limited to a view consecutive horizontal shots of a scenic landscape Panoramas can be arranged in several ways.
Types of panoramic arrangements
- Horizontal
- Vertical
- Matrix
- 360 Degree
- Parallel camera movement
For perfect results with any arrangement you should use a tripod. Make sure the tripod is level this ensures that your camera is consistently level in every picture. A tripod with a pan and tilt head is ideal for this.
The horizontal arrangement
For shooting a horizontal panorama, such as a landscape chose the desired tilt angle on your tripod. Then tighten the tilt adjustment screw to lock the tilt in place while leaving the pan screw loose. This will prevent your camera from tilting up or down while panning resulting in images that will line up perfectly. Now take all consecutive photographs while panning your camera from one side to the other, making shore to overlap each image by 20-30%.
The vertical arrangement
Panoramas can be shot vertically. This type of panoramic arrangement is ideal for objects that are tall and slim like a tall trees or towers for instance. Point your camera in the direction of the object or scene to be photographed and tighten the Pan screw on your tripod. Loosen the Tilt Screw and take each consecutive Pictures from top to bottom. Or bottom to top if you wish. Again make sure to overlap all images by 20-30%
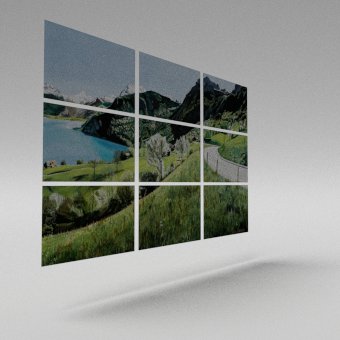
The matrix arrangement
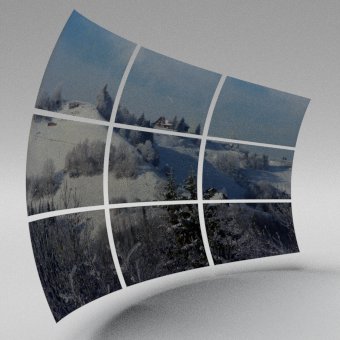
The Matrix arrangement consists of both horizontal and vertical rows of photos. And there are two ways you can approach it. You can photograph a horizontal row as described in the horizontal arrangement but once you have the first horizontal row completed tilt your camera up or down and take another row of horizontal photographs making shore that there is a 20-30% overlap between the rows. You can repeat this step to ad as many rows as you desire. The other approach works exactly the same except that you would be shooting a vertical row just like described in the vertical arrangement. Then pan your camera left or right and photograph another vertical row making sure to overlap the rows 20-30%. Again you can ad as many rows as you want. It is worth mentioning that a matrix which is proportionately the same as a ordinary Photo really looks equivalent to the photo having been taken with a wide angle lens. Except that the image will mimic a camera with a much larger sensor and a lot more pixels resulting in a extreme high resolution image with the potential for a much narrower depth of field, and narrow depth of field is not something you get with wide angle lenses and common sensor sizes. If you do not have any need for extremely high resolution or narrow depth of field you can save yourself a lot of work and just take the photo with a wide angle lens.
The 360 degree panorama arrangement
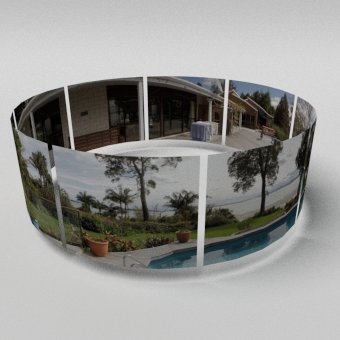
The setup for a 360 degree panorama is just like the horizontal setup except that you take consecutive photos of a scene, panning your camera on the tripod 360 degrees all the way around until you wind up back where you started. Some Stitching programs might allow you to stitch more than just one row of Photographs in 360 Degree mode. Some stitching software might allow you to stitch a 360 Degree Matrix of Photographs by adjusting the tilt-head on your tripod and taking another row of photos above or below your first row. You can repeat this step as often as you like.
Parallel camera movement
Parallel Camera movement is different from other types of panoramic arrangements in that it is not taken from a single point. The parallel camera movement arrangement is only used on flat surfaces such as paintings murals pictures and documents. When taking the consecutive photos the camera is not tilted on a tripod between photos. Instead the camera is always being moved along parallel to the surface of the flat object, while consistently maintaining the same distance between the flat surface and the camera. The camera is always facing the object head on at a 90 degree angle. Images can be taken vertically, horizontal or as a matrix. Just as with other arrangements all images should overlap 20-30%. The advantage of this method is that it will produce much better results on flat surfaces. However objects other than flat surfaces are not suitable for this method as objects behind other objects and objects of varying distances would cause serious parallax issues.
Tip
You can shoot your panorama in With the camera held in portrait mode instead of landscape. This gives you more picture height without having to use a wide angle lens. This is a good solution for stitching software that does not have a matrix stitch function or when shooting a 360 Degree landscape and your stitching software only allows one horizontal row of Photographs
Overlap
It is recommended that all panoramic photographs to be stitched should have a 20-30% overlap. The Photo stitching software needs the overlap in order to figure out where the photos need to be joined. Some software might be able to join Photos with considerably less overlap but it is better to be on the safe side and give the software plenty of overlap to work with for a guaranteed good result.
Placement of stitch seams
If your panorama contains a significant or important object like a large tree or a statue for instance. It is a good idea to arrange your shots in such a way that the object falls within one of your photos and does not land on one of the edges which will get joined in the stitch program.
Weather wind and motion
Wind still Cloud free sunny days are perfect for shooting panoramas. Evenly overcast skies also work well. wind and weather can make quick changes to your scene when shooting panoramas. Which is why attention needs to be paid to several environmental factors.
Lighting changes by wind and clouds
Clouds can make rapid changes to the lighting of your scene. If you are shooting a scene on a sunny day with various white clouds scattered across the sky. You need to make sure that none of the clouds are going to obscure the sun when you are half way trough shooting your panorama. Make sure all photos are taken before the cloud obscures the sun. You could also choose to take all the photos while the sun is behind the cloud. This could work Depending on the consistency and size of the cloud as well as how strong the wind is blowing. If the cloud is inconsistent which they often are it could be problematic as the lighting of the photos will also become inconsistent. If the clout is to small or the wind to fast you might not have enough time to complete all photos. If your panorama consists of only two to three Photos for instance you will be able to take them fast enough without any significant cloud and Lighting changes being able to occur. But if your panorama consists of many photos It could take you a long time and by the time you get to your last photos changes in lighting and clouds could mess up your final result.
Motion by wind
Wind is one source of motion. It causes clouds to move. This not only effects Lighting but when taking photos with clouds being visible in your shot you should take all panoramic photographs in consecutive order at a rapid pace wasting as little time as possible between shots. In most cases when done well cloud movement will be to insignificant to notice in the end result. Wind can also cause movement in trees and long grass. Consider a large tree standing close by and the wind is causing it to sway forth and back. It would be a good idea make shore the tree is placed well within a photo and not split up in between two consecutive shots as its position while swaying is unlikely to be identical when the two shots are taken. This would then cause a visible seam when stitching the photos togethor. Other moving objects that need consideration are People Animals and moving machines like cars or trains. The rule is never split up a moving object. By the time you have repositioned the camera to take the next consecutive shot the moving object will be somewhere else and you will be left with half an object in the middle of your panorama. Always place moving objects well within an individual frame.
How to create a clone within your panorama
This one kind of falls in to the moving object category but because it is such an interesting effect I thought it deserves its own explanation. If for instance you have a person standing in one of your panoramic shots and as you position your camera for the next consecutive shot that person walks in to the next shot before you take the picture he or she will appear in both pictures and when you stitch the photos in to a panorama that person will have an identical twin appear within that panoramic image. Sometimes you might want to avoid this and at otter timers you might want to do this on purpose for special effect. This effect is not just limited to people, It can also be done with animals or other objects tat move or can be moved. You can intentionally make the same stationary object appear several times in your panorama. Place the object in to your scene take the first shot position the camera for the next consecutive shot and move the object in to frame before taking your second shoot.
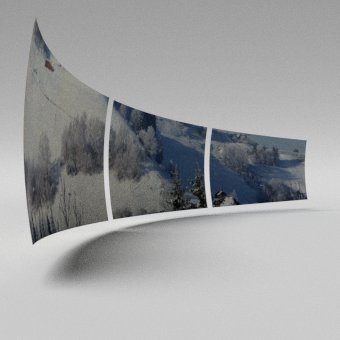
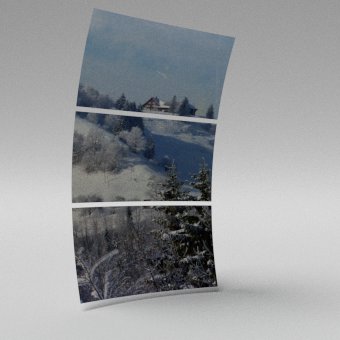
Overshoot for cropping
Panoramic Stitch software will usually bend photos in to shape this is to compensate for curvature caused by the lens in order to make consecutive Photos fit together perfectly and appear seamless. As a result the edges of the stitched Photos will be uneven in appearance and need to be cropped off. This is why when shooting Photos for a panorama scene it pays to overshoot and have a bit extra on the edges which will be cropped off after stitching.
Stitched image before cropping
The same image after cropping
Stitching software
There are lots of stitching programs out there some are expensive and some are free. They are not all equal and some stitching software yields much better results than others. You could manually align photos in GIMP or Photo-shop but the results would not look very good due to the lens distortion. dedicated panoramic stitching programs reshape the images distortion in such a way that they neatly fit together as if the image was taken trough one single lens. Some software achieves this task more successfully than others. Stitching flaws are not always obvious in landscape panoramas but are much easier to spot on straight and smooth objects such as buildings. The following image shows two comparisons of the same scene stitched using different software. The tree on the left is not aligned properly where as the tree on the right is aligned perfectly. The floorboard on the left is miss-aligned and the floorboard on the right is only slightly miss-aligned
Comparison of stitching quality of different software

Some companies like Canon will include a stitching program as part of the software package you receive with your camera. Whether you already have a stitching program or not I am pleased to inform you that Microsoft has developed a program Called "Image Composite Editor" or (ICE). The Microsoft Image Composite Editor Is a Advanced panorama stitching program of superb quality. And best of all it is Free. And in case you where wondering Microsoft ICE was the stitching software used for the images on the right in the comparison above.
Click here to Download Microsoft ICE
Another excellent panorama stitching program is the open source Hugin panorama stitcher. Hugin has several Projection types to chose from. If you want to create panoramas from images that where shot with inconsistent settings the way this tutorial teaches you not to do, Hugin has advanced features for correcting such inconsistencies so that even less than perfect images will still yield good looking panoramas.
Click here to Download Hugin
